After the brief introduction to equalization and dynamics processors—where, unfortunately, we had to go through quite a bit of theoretical “rambling”—we’ve now reached the point where some practical guidance is needed to help you get the most out of what we covered earlier. I hope you followed the advice in that article and now have a clear understanding of the theory behind EQs, gates, and compressors, and that you took the time to run some tests on your own tracks to ground that theory through practice. If not, I recommend you go back and do so before continuing.
My intention here is not to lay down absolute rules about how you should EQ or shape the dynamics of your tracks in a mix. My goal is simply to offer guidance on how to approach these complex processes sensibly, and to help you avoid developing bad habits. I’m not here to reveal any hidden secret about equalization, nor should you expect to become as skilled as top professionals just by reading this. What I do aim to provide are clear explanations of common techniques we professionals use—techniques that will be useful and applicable when improving the sound of your own music.
Why do we need to equalize?
Many musicians working in home studios start mixing with the assumption that EQ “must” be applied. In general this ends up being true, but—do they really know what EQ is meant to achieve? And even if they know that, do they know how to accomplish it? If you’re currently in that stage, don’t worry. Everyone begins by tweaking every plugin and device in sight, often without really knowing what each one does or what the goal should be.
Before anything else, you must understand that there are no magical formulas for equalization. You will not find a miracle chart or a “definitive EQ guide” that works in all situations. What you *can* find is advice that helps you achieve better EQ decisions—but as with everything in mixing, your ears, your experience, and your taste are what ultimately matter. Another key point is that during mixing—especially when it comes to EQ—your monitoring system plays a fundamental role. Forget about achieving good EQ decisions on laptop speakers or small computer speakers, even if the manufacturer claims they have a “flat response.” In my opinion, monitoring is the single most important component in the audio chain. Don’t be afraid to spend a good portion of your budget on the best monitors you can afford. Using mediocre monitors is like trying to paint a picture with twenty-five diopters of myopia in each eye.
When EQing during a mix, we need to achieve two goals. First, we must correct any flaws in a track. Microphone recordings are often far from perfect—sometimes due to poor room acoustics, weak preamps, subpar converters, inadequate microphones, or worse, poor engineering. In other cases, tracks may have been recorded in different studios, which is increasingly common thanks to the internet. Think about the acoustic issues of every different room, the differing monitor systems used, the variety of preamps… This extreme case should give you an idea of how important EQ becomes when it comes to correcting inconsistencies. On the other hand, even when everything is beautifully recorded, tracks can still contain frequency components that sound great in isolation but are unnecessary in the context of the mix. This is especially common with virtual instruments, as many of you will have already noticed.
Second, equalization must ensure that each musical element fits correctly with the others. As we mentioned earlier, elements can clash due to frequency masking or simply because they don’t complement each other when played together. The purpose of mixing, as the name implies, is to blend elements. We need all components of the song to work well as a whole.
Beyond these two essential functions, EQ also serves a third, less critical role: creative sound shaping. For example, the classic “telephone” or “radio” vocal effect is simply EQ. Extreme EQing is also common when working with synthesizers, helping create atmospheres, pads, and lead sounds with strong character.
It’s often helpful to think of EQ in two stages: first addressing the issues in a track, and then EQing it so that it sits properly with the rest of the mix.
The sweep technique
This section touches on psychoacoustics—topics that are often difficult to explain through text alone. English-speaking engineers typically describe tonal qualities using terms like “boxy,” “muddy,” and “boomy,” which sound nice and descriptive. I’ll try to be clear in my explanations, but the best way to understand these concepts is to take a track—preferably from a commercially mixed CD—and boost specific frequencies to hear firsthand how they affect your perception.
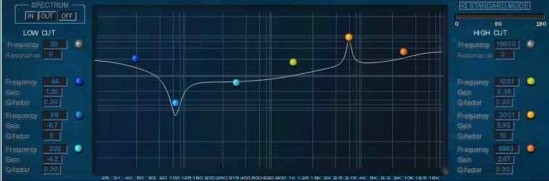
The first useful technique to learn in EQ is one of the most widely used: the frequency sweep. Imagine you have a guitar track with an unusual low-frequency resonance. How do we locate the frequencies causing the problem? With the sweep technique.
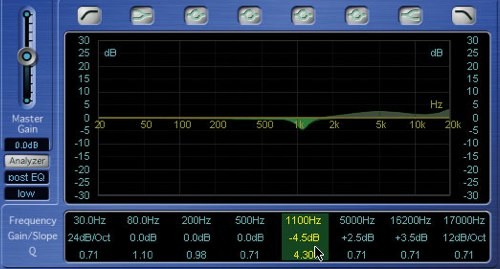
Here’s how we’d approach it. On a parametric EQ, set one band at around 500 Hz with a narrow bandwidth (around Q = 5) and boost it by about 8 dB. Slowly sweep the frequency downward until you reach the point where the unpleasant resonance becomes most obvious. Once you’ve found it, leave the frequency fixed and adjust the Q and gain until the resonance is mitigated without affecting the natural tone of the guitar.
As you gain experience, you’ll become faster at identifying problematic frequencies—eventually without needing to sweep at all. But early on, don’t hesitate to use this method. It’s simple, reliable, and helps train your ears.
Always keep in mind that…
Whenever you apply EQ to a track—regardless of the purpose—you should take into account a few important considerations about the equalization process.
First, be aware that any change in a specific frequency range will affect the way we perceive all the other frequencies. This is largely due to the masking effect mentioned earlier, which becomes especially noticeable in the high-frequency range, where low-frequency energy can mask higher frequencies. Therefore, if you make a cut at low frequencies, the highs will often appear clearer afterward.
It's also essential to remember that when equalizing, cutting is generally better than boosting. In other words… it’s better to remove than to add. This is because boosting frequencies can introduce unwanted coloration caused by phase distortion (don’t worry if you don’t fully understand phase yet—just keep in mind that it results in coloration). So whenever you want to enhance a sound, try cutting first. If you also consider the previously mentioned masking effect, you'll notice that cuts alone often achieve the intended improvement. Use boosts only when absolutely necessary or when you're deliberately trying to give a track a character it didn’t originally have (we’ll discuss this later).
When boosting very low frequencies (below 200 Hz), keep in mind that two small boosts at different frequencies are better than one large boost at a single point. You’ll achieve the same sonic effect with less coloration. In the next section, we’ll explain a technique to accomplish this.
Finally, try to make sure that the main elements of the mix sound as natural and pleasant as possible. For example, don’t over-emphasize the frequencies related to vocal intelligibility just to make the voice clearer—this can easily make it sound harsh. It’s usually far better to carve space in the accompanying instruments instead.
Corrective equalization
As mentioned earlier, we often encounter tracks with certain deficiencies that need correction. In other cases, we may want a track to sound more pleasant or to give it a character it didn’t originally have. While it’s risky to generalize in matters of EQ, there are frequency ranges that commonly cause problems.
It’s quite common to find tracks lacking definition or sounding somewhat harsh. The issue is usually concentrated between roughly 300 Hz and 800 Hz. You can perform an initial sweep, as explained earlier, from around 800 Hz downward to 300 Hz to pinpoint the frequency responsible for that unpleasant, boxy quality. Once you locate the problematic spot, all that remains is adjusting the Q and the amount of cut—keeping in mind that cutting too much may strip the track of its character. Most of the time, a modest cut is enough to fix the issue; however, if the track still lacks clarity, a slight high-frequency boost (1–2 dB) may help.
In some cases, boosting very low frequencies can enhance certain tracks and give them more weight or grandeur. For instance, kicks, bass guitars, or distorted guitars in heavy metal often benefit from a subtle low-frequency lift. As mentioned before, when boosting these extremely low frequencies, it’s better to apply two small boosts at different frequencies than one large boost at a single frequency. To do this, we can use a technique popularized by American engineers: identify the target frequency you want to reinforce, then perform a small 1–2 dB boost there. Next, activate another EQ band and boost either the approximate half frequency (if the target frequency isn’t too low) or the approximate double frequency (if the target is already very low). For example, if you choose to boost at 70 Hz, you might also apply a 1 dB boost at 140 Hz; or if your chosen frequency is 100 Hz, you could reinforce 50 Hz by 1 dB as well.
EQ as a Blending Tool
Keep in mind that EQ is one of the most delicate processes in a mix, and a simple change can be the difference between an average mix and a truly great one. Also remember that, although this article discusses individual processes separately, mixing itself is an intuitive and immediate act. That means you shouldn’t think of EQ as something that must be done strictly before or after dynamic processing. Everything should flow naturally.
As we already know, a mix has several structural elements, with the vocal — or the lead instrument being the most important. Everything else must support it. For that reason, we must ensure nothing gets in the way of the vocal, causing, for example, a loss of intelligibility or a harsh tone from unnecessary EQ boosts. In most modern popular music (pop, rock, metal, various electronic genres…) we typically have a defined rhythm section and a lead vocal. In other genres like jazz, we may instead have a more atmospheric rhythm section and a series of lead instruments, but the underlying philosophy remains similar regardless of style.
Here, I’ll refer to a typical pop/rock band mix, though the ideas can be applied to any genre simply by identifying the equivalent musical elements. The first step is to achieve solid coherence between the rhythm section and the vocal. Start by bringing up only the kick drum and shaping it according to what we've discussed so far. Then add the snare and do the same. Kick and snare rarely clash, but ensure they work well together. Next add the bass, shape its tone, and verify that it complements both kick and snare without conflicts. It’s crucial to make these three elements work well together through EQ, since they provide the musical foundation — with particular attention to blending kick and bass. Then add the vocal or lead instrument and repeat the process. At this point, the core of your mix should be well balanced, which is usually the hardest part. From there, begin adding the remaining elements, adjusting the newly added tracks as well as revisiting previous ones to ensure everything blends naturally.
Your goal is for the overall mix to sound pleasant and to serve the musical intention of the piece. Each element should be clearly audible without interfering with the others. But this doesn’t happen by chance — as you begin adding layers, elements will inevitably start to clash.
There are two main ways to address this. The simplest is to pan the conflicting elements. For example, if a lead guitar and rhythm guitar are clashing, simply placing them at different points in the stereo field may solve the issue. However, this only works in certain cases. More often, you’ll need to adjust the EQ of each track. When you detect a conflict, first examine any EQ settings you’ve applied so far. Perhaps both tracks have similar boosts in the same frequency range, or maybe a boost on one track coincides with the natural timbre of the other. In this case, you can shift the boost on one track slightly upward or downward so they don’t collide, or apply a small cut on the track whose natural tone overlaps that boosted region. Sometimes one track may have a cut in a certain frequency range — in that case, adding a small boost in that same range on the other track can help distinguish the two.
The key is ensuring that tracks don’t obscure one another. While I’ve mentioned a few ways to solve these issues, over time your ears will guide your decisions more intuitively. Often, just a subtle boost or cut of a few dB is enough to fix a conflict.
Tips (Not Commandments) for Equalizing Instruments
In this section, we’ll take a look at the spectral characteristics of some common instruments and offer some guidance on how to EQ them effectively. Always remember that every track is unique: different musicians, microphones, acoustics, preamps... which means each track’s balance, and therefore its EQ needs, will also be unique. And each musical piece is also unique, so what a track needs will change from one song to another. Please treat this part of the article as a reference to help you EQ with intention — not as a “magic EQ chart,” which usually does more harm than good. One of the best ways to train your ear before EQing anything is to load a project in your DAW, solo a single instrument, and experiment with boosting and cutting the frequencies described here using a parametric EQ. This will help you clearly understand the character of each range.
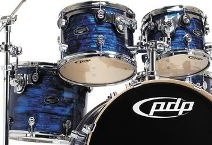
Kick Drum
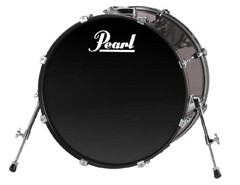 A kick drum essentially has three well-defined frequency regions. At the lowest end of the spectrum you’ll find the “weight” or “thump,” typically between 50 Hz and 100 Hz depending on its size and model. When you want more depth or fullness, this is the range to work in. Keep in mind that when boosting these frequencies, it’s best to apply the “half or double frequency” technique discussed earlier whenever possible. Also be aware that too much boost here can make the kick muddy and destabilize the entire mix. Below roughly 50 Hz, there’s usually nothing useful, so applying a high-pass filter around 45 Hz is often a good idea. This removes unnecessary sub-rumble and helps any compressor on the kick behave more musically.
Moving up in frequency (200 Hz to 400 Hz), we find the “body” or “boxiness” of the kick. In most cases, this area benefits from a cut, since unwanted resonances tend to live here. You can use the sweep technique to identify the precise problematic spots. Poor EQ choices in this range are one of the main reasons a kick can end up sounding amateurish.
Finally, the upper-mid region contains the kick’s attack — the component that gives it its English name, “kick.” This transient punch usually lies somewhere between 2 kHz and 7 kHz. Each kick has its own specific attack frequency, so again, use the sweep technique to identify it. What you should avoid — whether on a kick or any other element — is being lazy and using a very wide Q to boost or cut large frequency regions, because this will affect far more than the target frequency and may compromise your entire mix. A useful tip when EQing a kick is to use the “gaps” left by the key kick frequencies to position the bass. As mentioned earlier, the kick/bass relationship is crucial for a strong mix since most of the song’s stability lives there. You can work creatively by cutting around 100–200 Hz and around roughly 500 Hz–1 kHz.
Snare
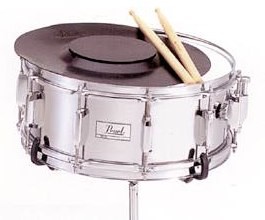 The snare drum has four very well-defined frequency regions. First, there is the 120 Hz to 350 Hz area, which provides the snare’s “body” or “weight.” These days, it rarely makes sense to keep frequencies below roughly 120 Hz on a snare, since they contain no useful information and too much low-end buildup can make the snare sound muddy. It’s often a good idea to use a high-pass filter around that area, or, if you're aiming for a vintage sound, set the high-pass slightly lower. If the snare still sounds unfocused, you can insert a shelving EQ to apply a gentle cut between the high-pass filter and 120 Hz — this cleans up the sound without destroying the vintage character you're going for. Next, we have the “boxy” range between 800 Hz and 1 kHz — also responsible for that notorious “demo” sound. Some snare models (thin snares used in heavy metal) produce very little in this region, while others (such as wooden snares used in rock) can be harsh here. Depending on the snare, the musical style, and your mixing goals, you may choose to boost or cut — though cutting is usually more common. Between 2 kHz and 5 kHz you’ll find the metallic ring of the snare’s rim. These resonances give the snare a metallic character.
Finally, the dry attack of the snare typically lies between 5 kHz and 8 kHz. Sometimes you may want a brighter snare sound; in that case, boosting around 10 kHz often works well. The snare’s tone is extremely important in a mix, and EQ plays a major role here — its character will shape the overall feel of the finished mix, so take your time and do it well.
Toms
 Because toms come in many diameters and depths, we need to spend extra time identifying the key frequencies of each one. Generally, floor toms have useful information down to about 100 Hz, while rack toms extend down to around 250–300 Hz. You can use filters to remove frequencies below that range to clean up low-end rumble and unnecessary noise. However, sometimes reinforcing the lows of a floor tom can be useful for adding depth — especially when the floor tom is used as part of a rhythmic pattern. The main resonant tone of a floor tom usually appears between 100 Hz and 200 Hz, while rack toms resonate more commonly between 300 Hz and 600 Hz. The attack of the stick on the head is typically between 1 kHz and 3 kHz, and if you want to emphasize the sound of the stick hitting the skin, look around 5–6 kHz.

Hi-hat
For the hi-hat, a high-pass filter around 150 Hz is usually appropriate. You can shape the stick attack between 150 Hz and 300 Hz to help it sit in the mix. The most important frequencies for the hi-hat itself usually lie between 500 Hz and 800 Hz. When you want more brightness, you can use a shelving EQ starting around 10–13 kHz. If your EQ allows it, experiment with different slope settings on the high-frequency shelf.
Cymbals
When you have individual tracks for each cymbal, treat the 100–300 Hz region the same way you would for the hi-hat, adjusting it to refine the stick attack. This is especially important on the ride cymbal, while for crash and splash cymbals it matters far less — in those cases the tail and shimmer of the cymbal are what matter most, not the definition of the stick. As with toms, you’ll need to carefully identify useful frequencies, as cymbals vary widely in size, construction, and tonal character. A high-pass filter is always needed; start around 100 Hz and raise the cutoff until you hear it begin to remove important information. The 1 kHz to 6 kHz range is crucial for defining the tonality of most cymbals. If you want additional brightness, experiment with boosts between 8 kHz and 12 kHz.
Overheads
Overheads are often underestimated, even though many engineers actually begin a mix with them. They capture the overall image of the drum kit, including the room ambience and spatial distribution. If you relied only on close-miked tracks — especially after gating and EQing each element — the kit could easily lose cohesiveness and begin to sound like a collection of isolated parts rather than a single instrument. Think of a string section in a symphony orchestra: when recorded, the goal is to present them as one cohesive entity, not as individual players. The same concept applies to drums. Overheads help bind the kit together.
Overheads are also key to achieving a natural drum sound. A high-pass filter around 150–200 Hz is commonly used to avoid low-end buildup. Cuts around 400 Hz can help remove boxy resonances. If you want a clearer, more open sound, you can also cut between 700 Hz and 1 kHz. Finally, a shelving EQ around 12 kHz can enhance the brightness and air.
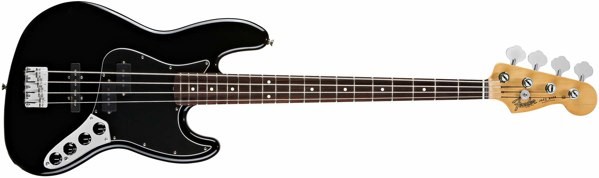
Bass
The bass is the instrument with the widest frequency spread. Many people associate the bass exclusively with low frequencies, but in reality it has important components across almost the entire audible spectrum. Fundamentally, two regions are especially important: 80–100 Hz, where the bass gets its weight or depth, and 120–300 Hz, where it defines its “color.” Many people make mistakes here — often cutting too much of the low end and boosting the upper range to “clarify” the line, simply because they think the bass lives only in the lows. I recommend setting up a parametric EQ with two narrow-Q bands: one around 90 Hz and one around 200 Hz. Typically, you’ll cut at 200 Hz and compensate with a small boost at 90 Hz to preserve low-end fullness. After that, you can shape definition in the upper ranges — usually between 500 Hz and 1.5 kHz depending on the bass, amp, microphone, and preamp used in recording.
Finally, in rock, metal, punk, and similar genres, you can work between 2 kHz and 6 kHz to accentuate the metallic sound produced by pick or finger noise. A shelving EQ can also be used here. If you listen to classic Iron Maiden albums, you’ll clearly hear the result of emphasizing these frequencies.
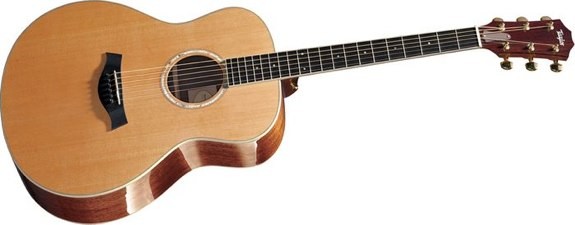
Acoustic guitars
Acoustic guitars have three main frequency regions. First, the low-frequency area: depending on where you boost or cut, the tone can change dramatically. You can work between 80 Hz and 300 Hz, but boosting or cutting this entire band at once is usually a mistake. It’s better to divide it into two sub-bands: roughly 80–150 Hz and 150–300 Hz. Changing just one of these ranges — whether boosting or cutting — will usually be enough to shape the tone without overprocessing the low end. The definition of acoustic guitars is typically shaped between 2.5 kHz and 5 kHz. Be careful here, as excessive boosting can lead to a “nasal” tone.
The shiny, metallic character of acoustic guitars lives between 5 kHz and 10 kHz. Depending on your intentions and the guitar used, you may boost, cut, or leave this range untouched.
Electric guitars
The frequency analysis of electric guitars is quite complex, since their sound depends heavily on the musical style, the guitar model, the amplifier, the effects used, and so on. We also need to remember that electric guitar tracks are usually EQ’d at the amp already, and even though further EQ in the mix is almost always necessary, that initial tone-shaping makes frequency analysis even trickier. Clean guitars share many key frequency areas with acoustic guitars. Distorted guitars, however, vary so much from track to track that all I can offer here are some general guidelines for mix EQ.
On distorted guitars, a high-pass filter is essential to remove low-frequency noise and rumble, which are often very noticeable. Keep in mind that even the heaviest-sounding guitars will have little to no useful content below about 80 Hz. A good starting point is to place a high-pass around that frequency and slowly raise it until you notice that you’re starting to lose important tone.
Once you’ve found that cutoff point, leave the filter there. If you want your guitars to sound powerful, you can add some low-end reinforcement between 150 Hz and 250 Hz. Be careful not to overdo it, or the guitars will become blurry and smear the entire mix. To control how “aggressive” or “harsh” the guitars feel, work between 3 kHz and 5 kHz. Boosting this area will make them more cutting and forward (typical of British-style tones), while cutting it will produce a smoother sound—although that might not always be what the mix needs. Also keep in mind that boosting this range will increase the perceived noise and hiss inherent to distorted guitars.
Vocals
 Finally, let’s look at the most important element: the voice. Before talking about how to EQ it, we should reflect on how speech intelligibility is distributed across the frequency spectrum. Various psychoacoustic studies have all reached the same conclusion. In one such study, several recorded texts were played back with different EQ curves, and listeners were asked to write down what they understood, as if it were a dictation. The results revealed three well-defined frequency regions that are crucial for speech intelligibility. They also showed that the areas with the least energy tend to play the smallest role in comprehension.
The low-frequency range of the voice sits roughly between 125 Hz and 250 Hz. Though narrow, this band is very important, because it contains the fundamental timbral information of the voice—in other words, this is where we recognize who is speaking (or singing). The next region runs from about 300 Hz to 1.5 kHz and contains most of the voice’s energy, mainly from the vowels.
The final band, from about 1.5 kHz to 4 kHz, contains the consonants. Even though there isn’t much energy here, this range is essential for intelligibility. This division of the vocal spectrum is vital when learning to EQ vocals, because we not only want a pleasant tone, we also must preserve clarity. Once you understand this structure, it becomes easy to predict what will happen when you boost or cut a given frequency range in a vocal.
For instance, boosting the low band (125–250 Hz) will make the voice sound fuller, but will not significantly affect intelligibility. To work on definition, focus on the 500 Hz to 1.5 kHz region. Boosting between 1 kHz and 3 kHz will produce a more “nasal,” cutting sound. If you cut between 3 kHz and 5 kHz, you’ll notice a loss of intelligibility and the lyrics will become harder to understand. It’s also very important to pay attention to the consonant harmonics between roughly 5 kHz and 10 kHz, as this is where sibilance (“s” sounds) can become a problem. Sometimes a gentle high-shelf boost above 10 kHz can add a pleasant sense of “air” to a vocal.
Conclusions
As you’ve seen, applying EQ is a delicate task and, in my opinion, the most complex process in mixing. Don’t get frustrated if you struggle at first to achieve a good tonal balance. As the saying goes, experience is the mother of all science — and when it comes to EQ, technical knowledge alone isn’t enough. As we discussed previously, the basic operation of EQs is relatively simple to understand. What truly matters is letting your ears gradually learn to recognize frequencies, and allowing your experience, taste, and common sense to guide your decisions.
It’s also crucial—yes, I know I keep repeating this—to remember that what really matters in a mix is the overall sound. We shouldn’t sacrifice the global balance just to make a single track sound “perfect” on its own.
We’ll stop here for this article. We’ve focused on practical aspects of equalization, and I hope you’ll work through what we’ve covered, because solid EQ work is essential for a good mix. I know there’s a lot of information here, especially if you’re just starting out. I also know this isn’t the kind of article you can skim through quickly and instantly absorb… but nobody said this would be easy. In the next installment, we’ll look at another of the most challenging aspects of mixing: dynamic processing. We’ll also explore some advanced techniques with dynamics processors that can be extremely useful. See you in the next article. Until then… don’t EQ without a purpose.
Author: José A. Medina (2008)